Imitating the eye is not as easy as that of the apple! It is not like we are ruling out your courage but it is the reality. Even the master of artists finds it difficult to emulate the eye. It is so because when someone is trying to draw an eye, he is not just portraying the physical appearance of it. Considering the emotions and feelings behind the viewable curtain of eyes is also important as to make the drawing expressive.


Copying down line-to-line and curve-to-curve and every single detail wont you’re your portrait look real. Emotions are endless. You become happy and sad and happy with tears and sad with fake smile and angry and calm and so on and so forth! Tell me if still anyone thinks it is no big deal to draw an eye. However, after learning so much about the different types of shapes of eyes you will find it easy to recognize the characteristics of eye and impersonate it on a paper.
How to Draw an Eye
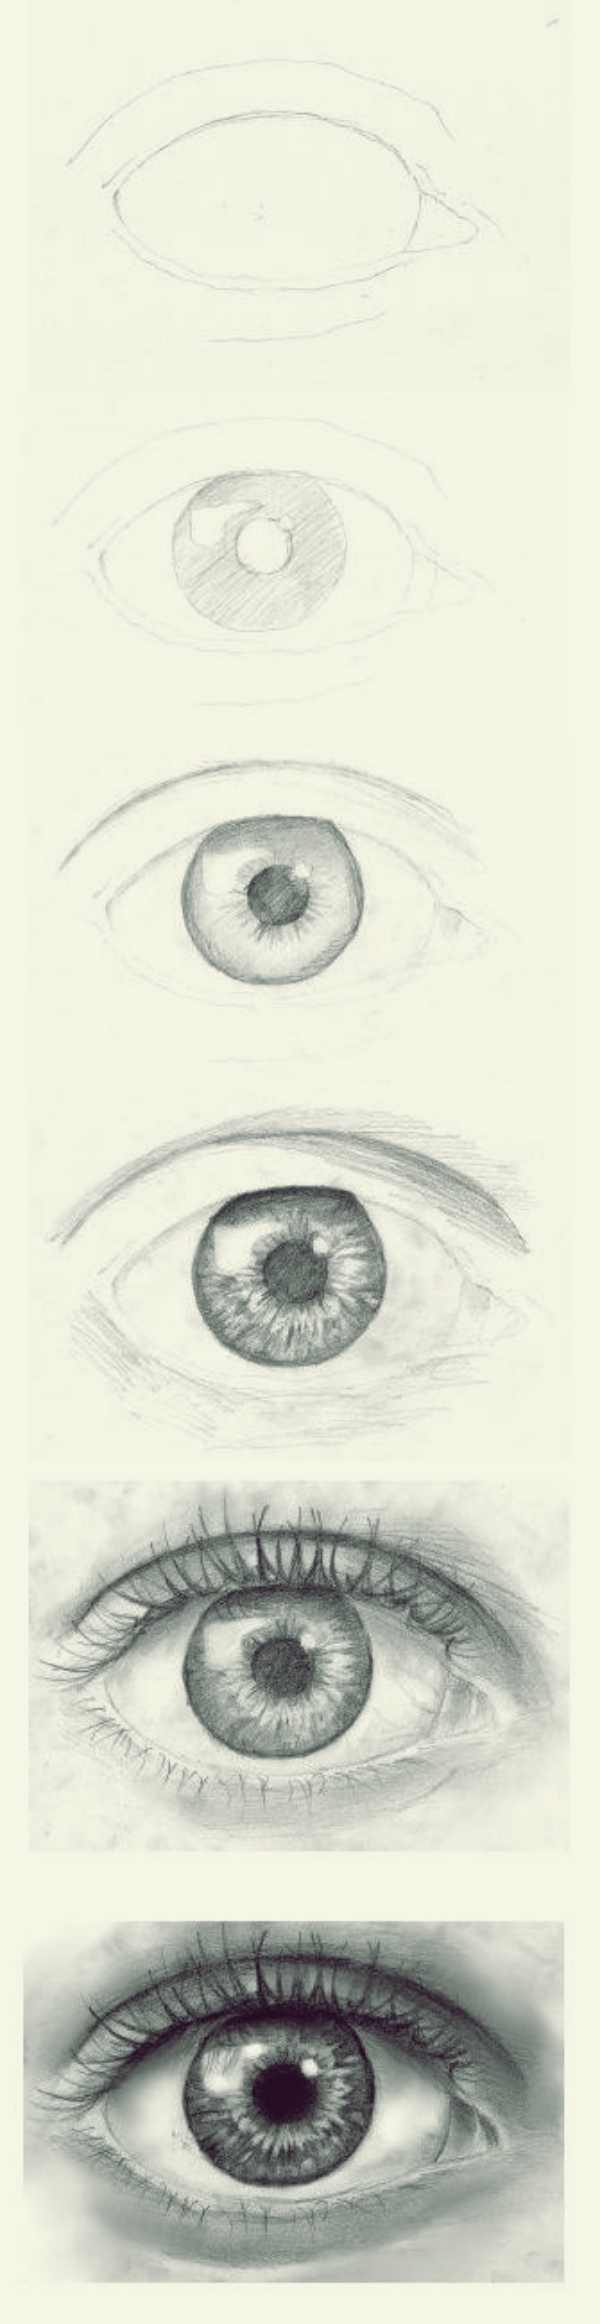
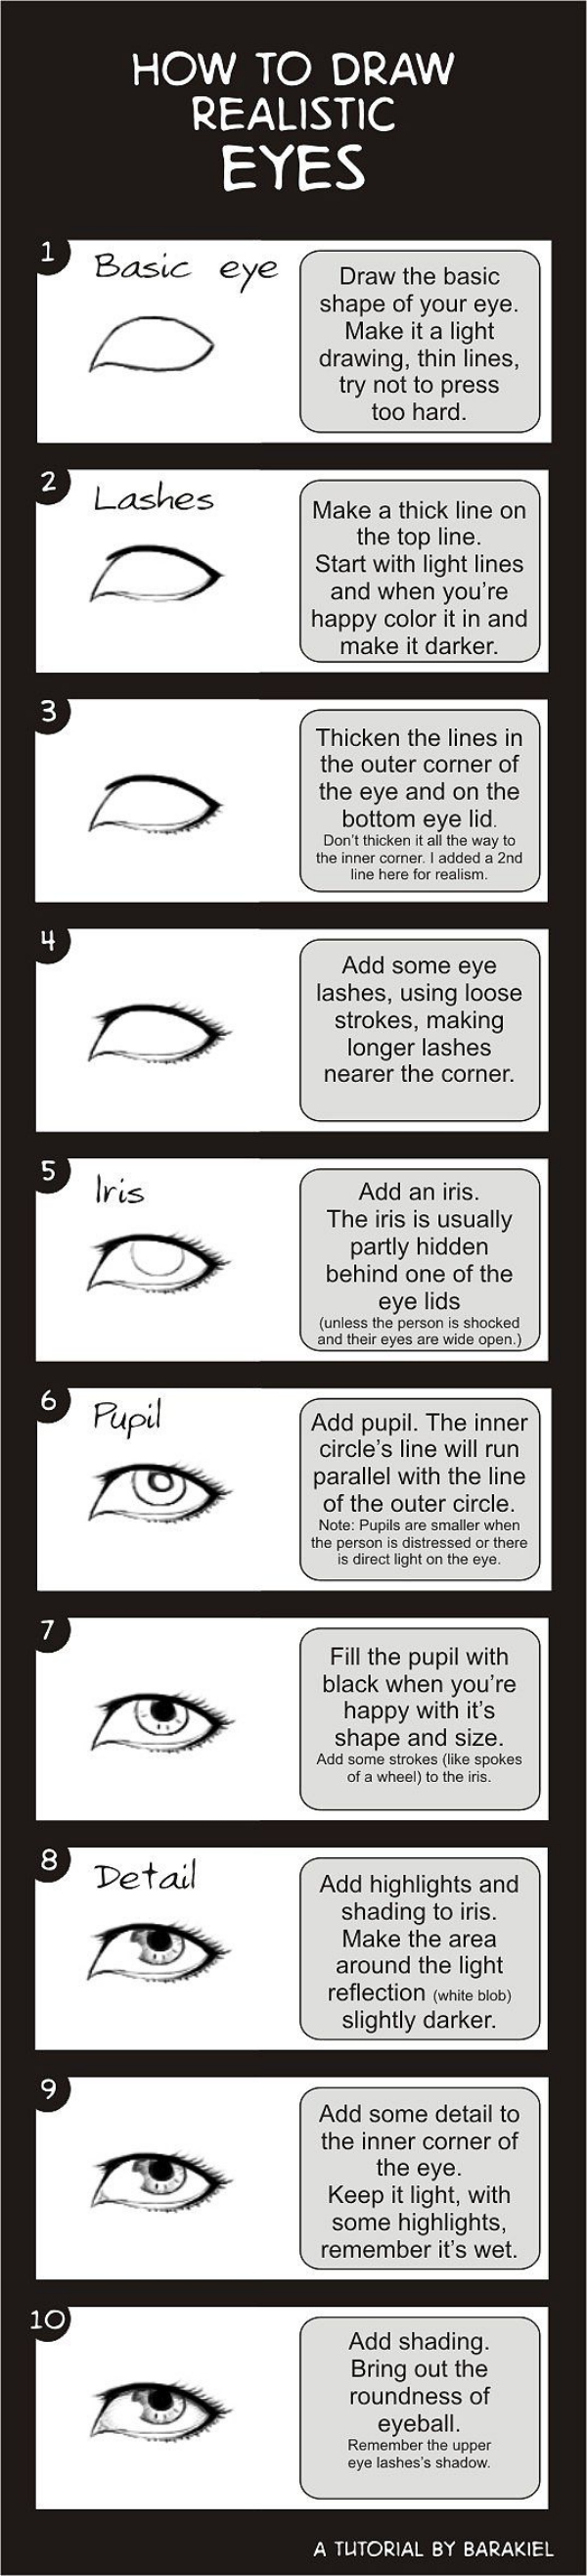
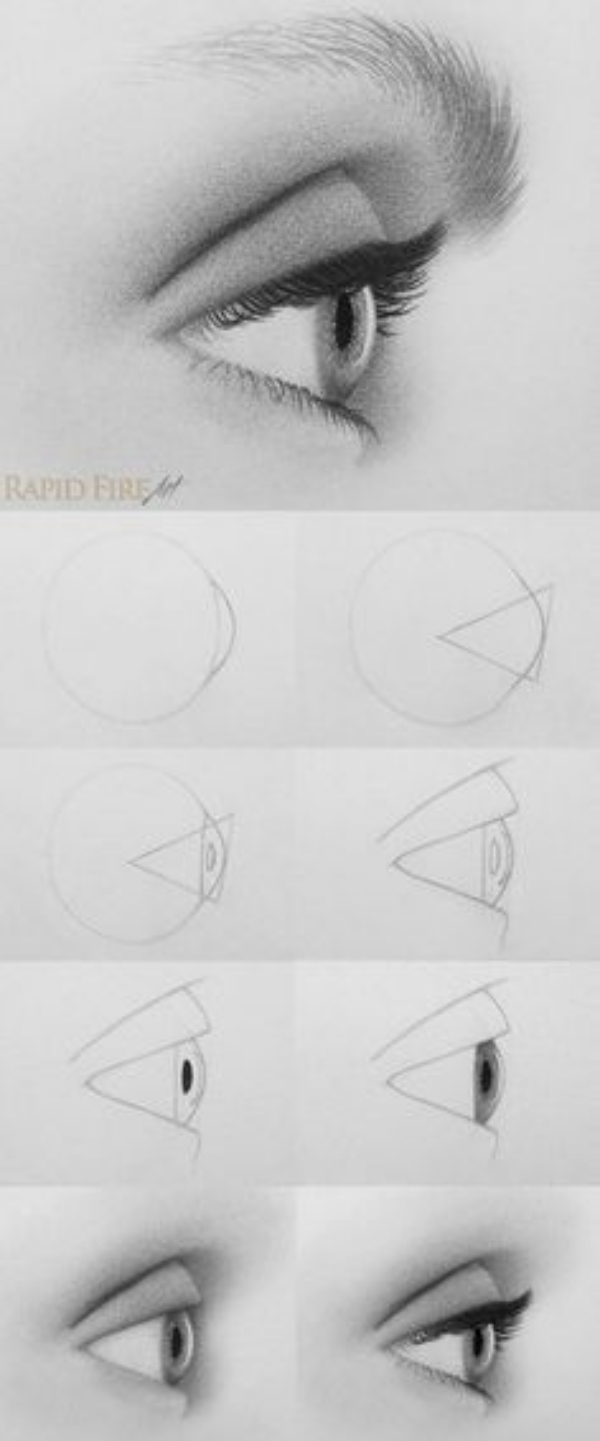
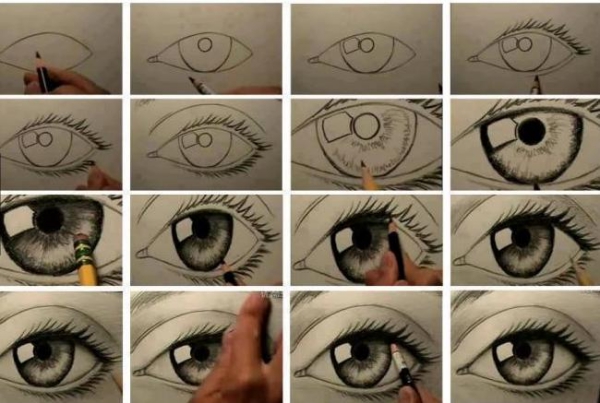
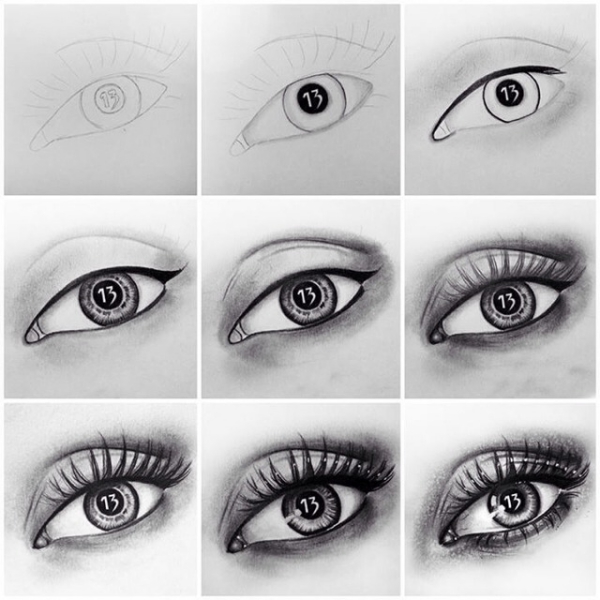
Draw the Basic Shape of the Eye – Single line structure called the outlining is where your drawing should begin. Start up with lightly drawing the shape of eye intersecting two curves.
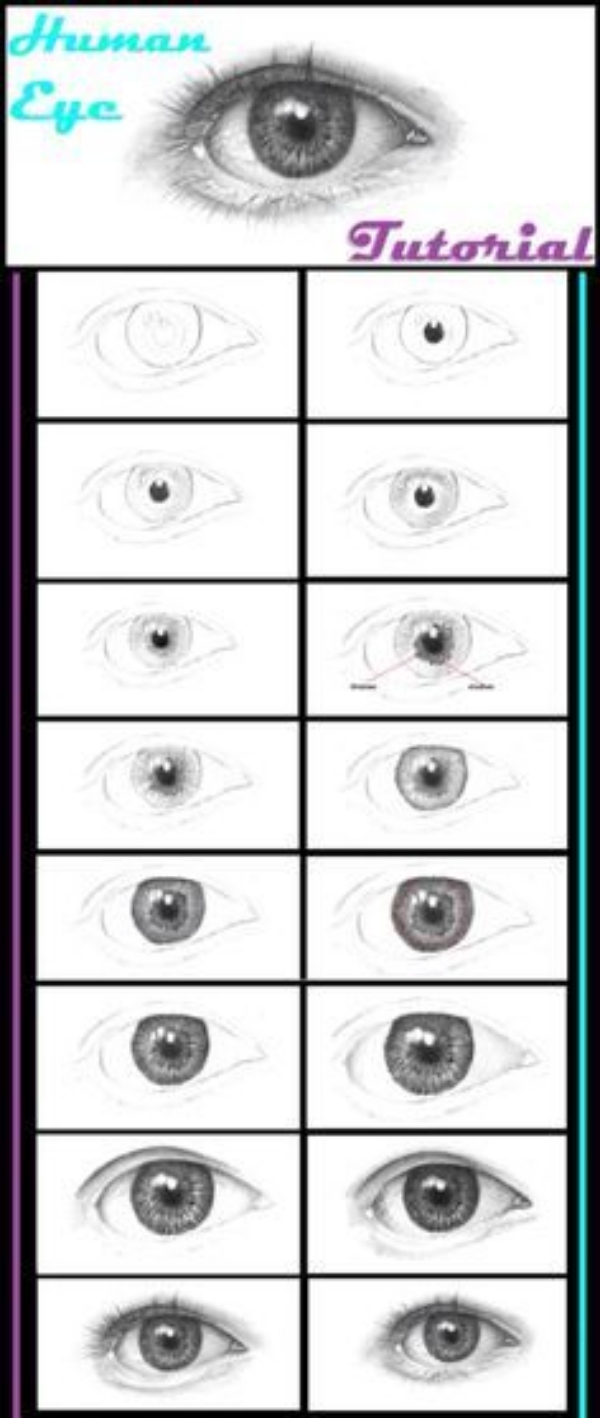
Step up with the Other Basic details within the Eye – The next turn is of other details like the basic shapes of iris and pupil. Don’t forget to mark the tear duct in the lightest weight on lines and shades.

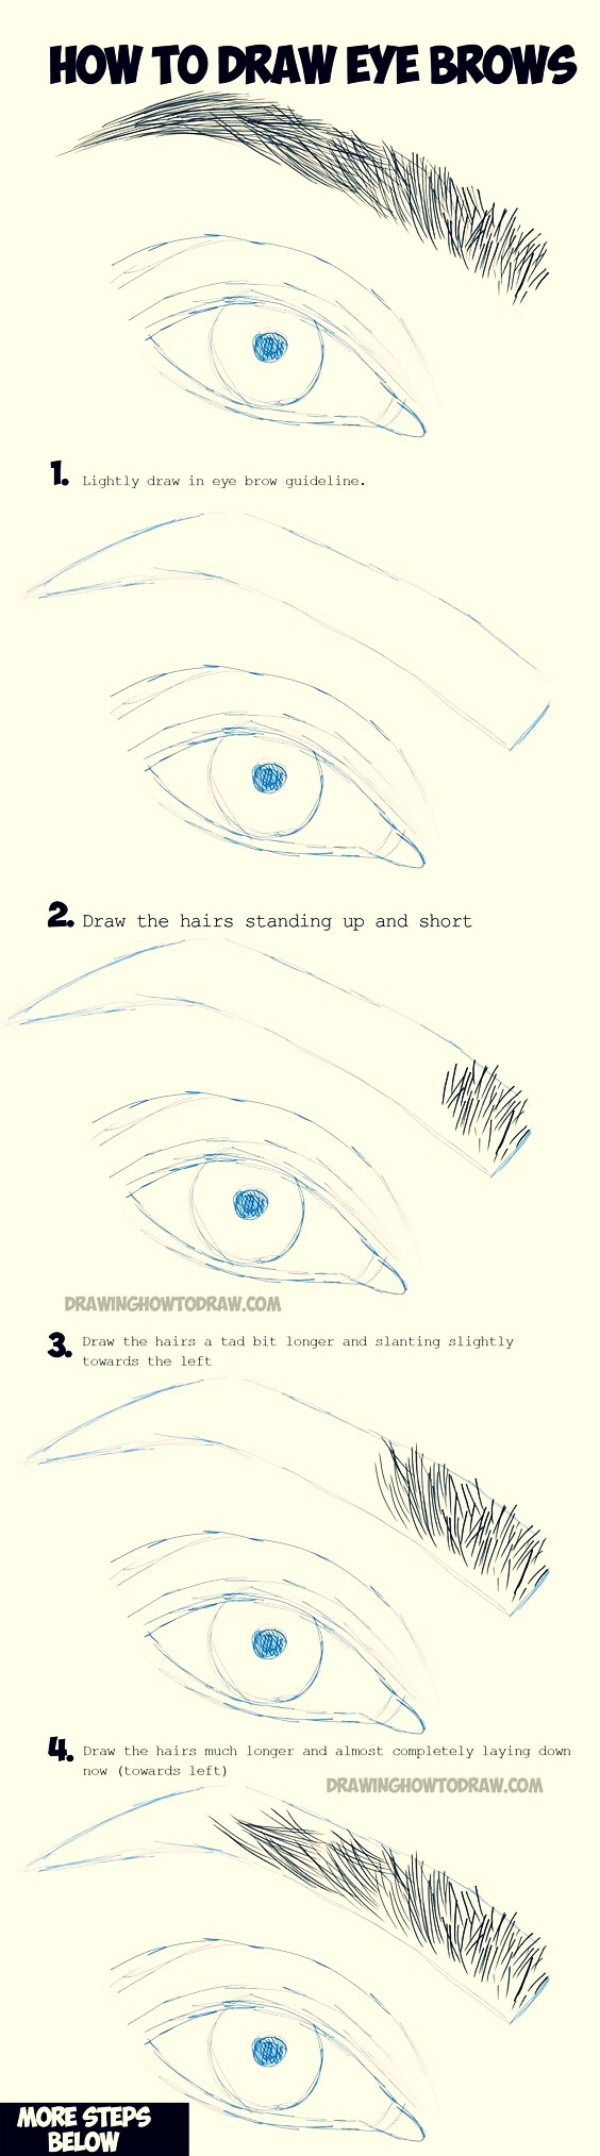
Eyelashes – Heavy or normal or light lashes? Get to know this very important fact before starting to draw an eye. Also, you must know all about the crease on the eyes and how deep are they! There are different shapes of eyes on which depends the type of eyelashes as well. Hooded eyes and the wide set ones and the deep set ones and so on that is responsible for lighter or heavier lashes.

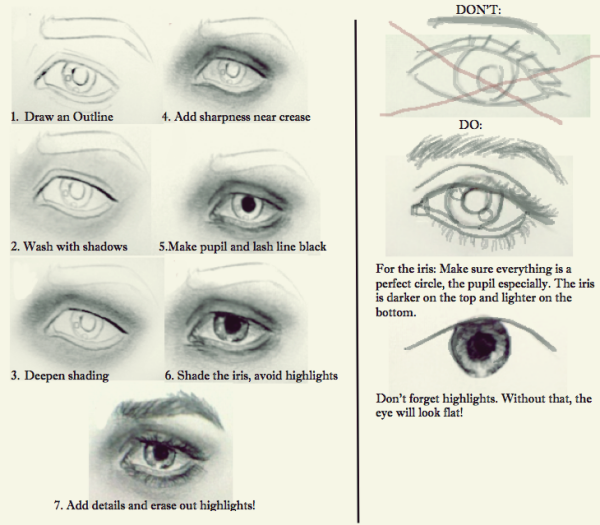
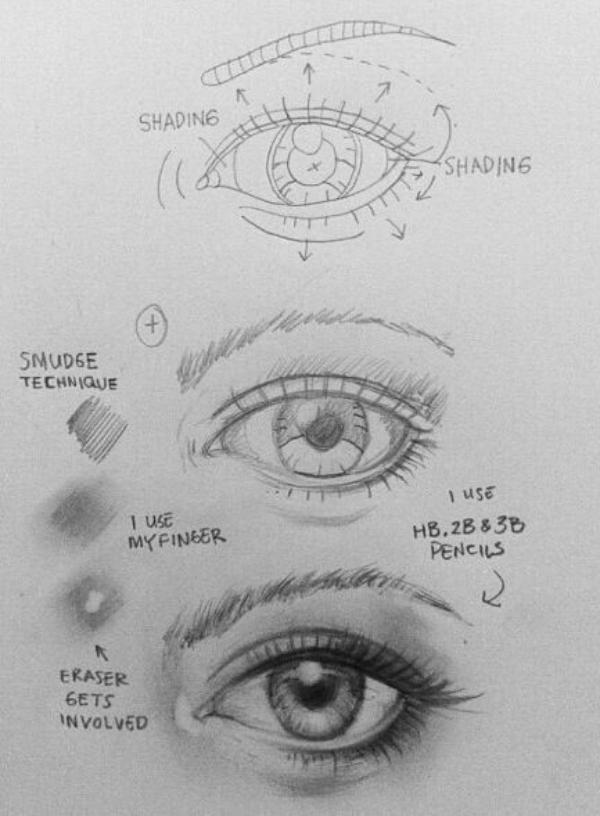
Toning up Iris and Pupil – Drawing the reflection of iris at the circumference of iris is the foremost thing you need to do and then comes the moment of drawing the darker to lighter concentric lines where center is pupil. Coloring up the pupil making it completely opaque will complete your iris and pupil.
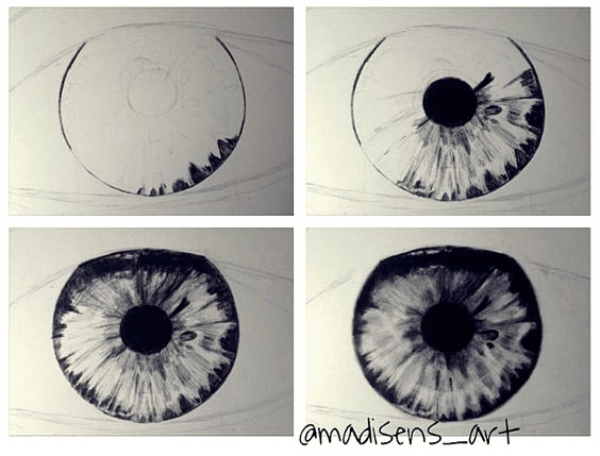
Reflection of the Light for Real Picture – Light being reflected from the eye creates a bubble like image on the iris that makes the image look more real. Just border the image out and let it go blank without any hint of shading or slightest of the coloring. May be sketching out the Eiffel Tower will be a good start for practice.
Notice where the Shades go Darker and Lighter – For instance, the tear duct where the two curves of the eye meets together is a bit shaded and so does the outer corner of the eye as well.
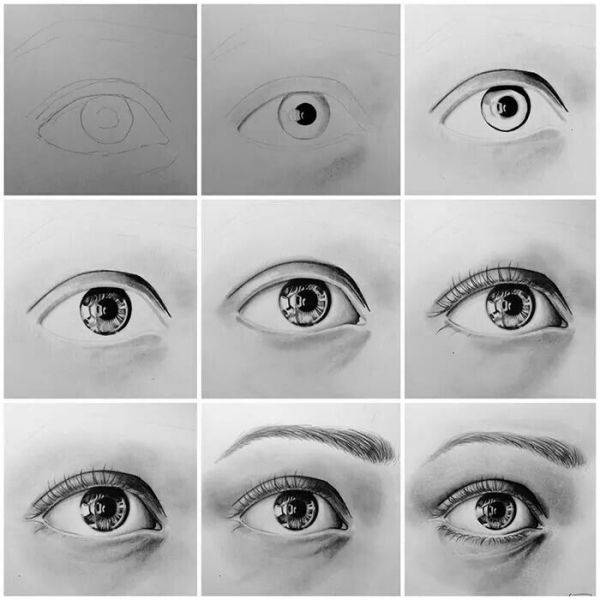
Eyes do have Some Width – Allow yourself to bold the outline since there is some width of your eye. Shading deeply at the wrinkle above your eye is also required for a more natural look.
Then Comes the Eyebrows – First the basic shape and then the shaded going lighter at the upper ends and darker in the mid and starting portion. Line to line imitation may work in case of eyebrows.
Ruling Out the Blankness of Page – Shading lightly all through the page will remove the whiteness and bringing up an extravagant focus towards your artwork. This undeniably contributes to the completion of the sketching looking really real.


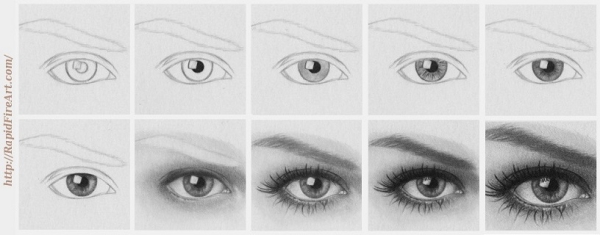
There isn’t a single way of getting an eye sketched out since the angle and mood may always vary which changes other conditions for an artist to emulate the eye. Though, the basic method will always remain the same. Starting up with the borderline introduction of the image and finally ending by pouring some depth into the image through the shading tricks. We hope these images will give you an overview of how to draw an eye clearing all of your doubts that you might have even after the explanation of procedure. Learning some acrylic Paintings ideas and techniques will definitely take your sketches up with the natural color tones of an eye.